Usage
Requirements
Python 3.10
Ansys Lumerical FDTD 2021 edition or later
An installation of MPI, for running simulations in parallel
Qt6
If creating a conda environment, there is not official PySide6 package yet. After activating your environment, you will need to install PySide6 with pip.
Using vipdopt
To run an optimization, Vipdopt requires a project_directory containing two files:
A configuration file containing optimization parameters
A sim.json file containing the base simulation file to run with Lumerical
More details regarding configuration files are located in the Configuration section.
To run an optimization from a pre-existing project directory, run:
python vipdopt optimize path/to/project/directory
To see more options, run
python vipdopt --help
Outputs
All created files and logs are packaged and output to the selected project folder by default. The internal folder structure is as follows:
data: Data generated in the optimizationopt_info: captures pertinent information about each iteration and epoch of the optimization. Save data is also collected here for the event that an optimization needs to be restarted.
.tmp: Lumerical.fspsimulation files and log files that are used to calculate the adjoint and forward E-fields for calculation of the optimization gradient.
The folder opt_info collects information about optical figures of merit, the latest 3-D permittivity values of the designed device, the adjoint gradient, and contains auto-generated plots of the evolution of these values throughout the optimization.
(Please note that values such as transmission are not normalized rigorously for these auto-generated plots, as the inclusion of the proper monitors in Lumerical for rigor would slow down each optimization iteration greatly.)
A log file is also created in the main project folder, named with the specified name using the --log option (defaults to dev.log).
GUI
The GUI [1] can be started by running
python vipdopt gui
This will launch a dashboard that can monitor the progress of a optimization.
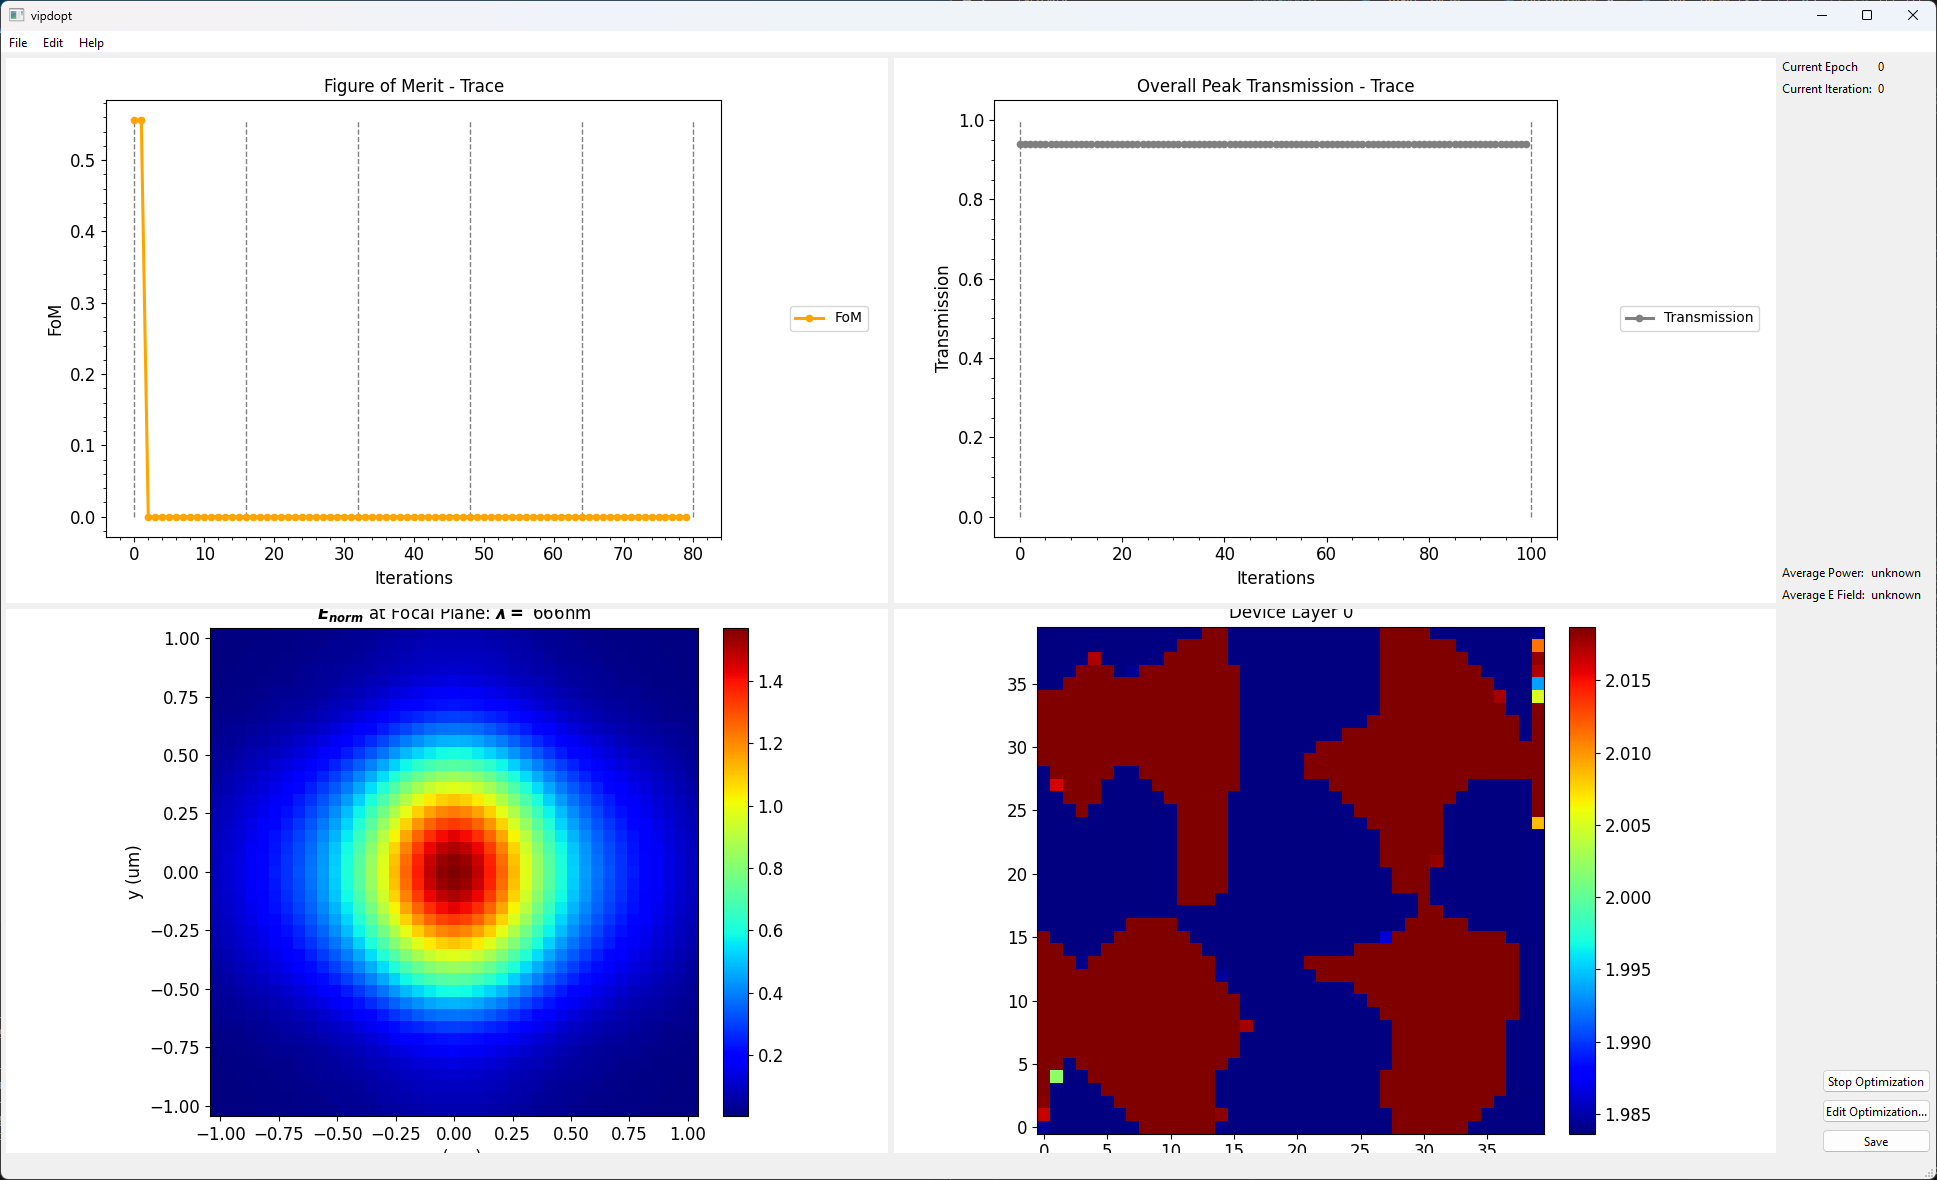
From the dashboard you can also open a dialog for editing [2] the optimization parameters
While starting and stopping the optimization through the GUI is not completely supported yet, there are some experimental features pertaining to those functions.
Clicking the “Start Optimization” button will create a slurm script that can be submitted to run the optimization. To alter the output file format, edit the submission script. The parameters of running the job are included in this file according to the SLURM documentation. More information can be found there.